Learn how to install Kioptrix Level 1 in VMware Workstation and Oracle VirtualBox with this complete, step-by-step beginner’s setup guide.
Setting up a vulnerable virtual machine in a isolated sandbox environment is an essential first step for practicing penetration testing and ethical hacking safely. In this walkthrough, we will cover everything from downloading the official .ova image file from VulnHub to fixing OVF import errors, configuring network adapter settings (NAT/Bridged), and successfully booting into the Kioptrix system terminal.
1. Prerequisites for Local Lab Setup
Before starting the installation process, ensure you have downloaded the required virtual machine files and possess a fully functional hypervisor installed on your system.
Virtual Machine Image: Kioptrix Level 1 (.ova or .vmdk format).
Hypervisor Software: VMware Workstation Pro / Player or Oracle VirtualBox.
Attack Platform: Kali Linux VM running on the same network environment.
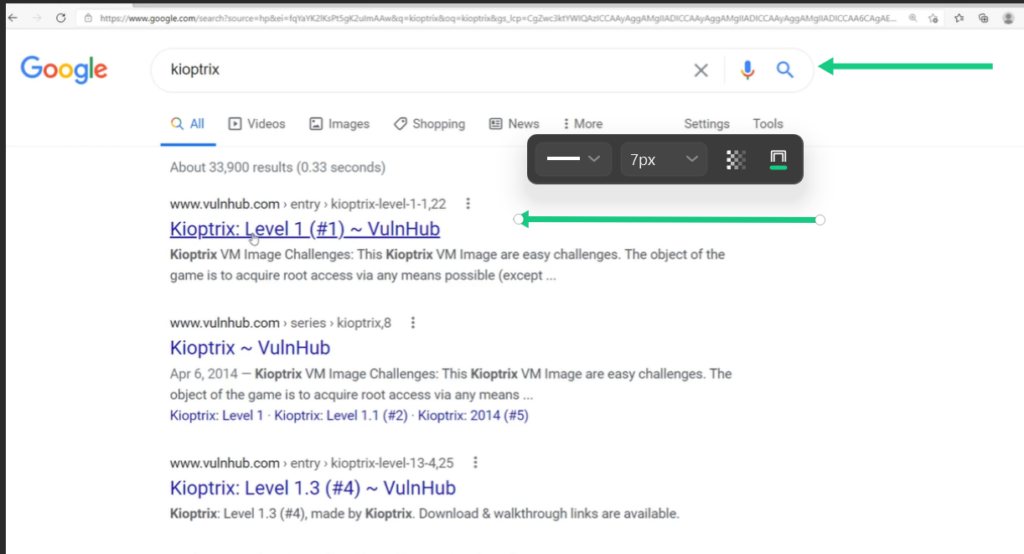
Start by searching for “kioptrix” on Google to find the official download source on VulnHub.
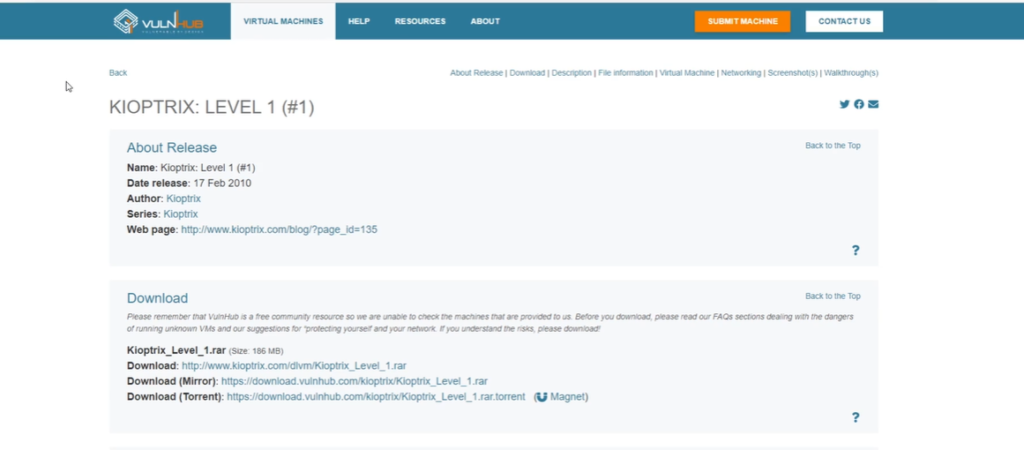
Navigate to the VulnHub page for Kioptrix Level 1 and locate the official download links section.
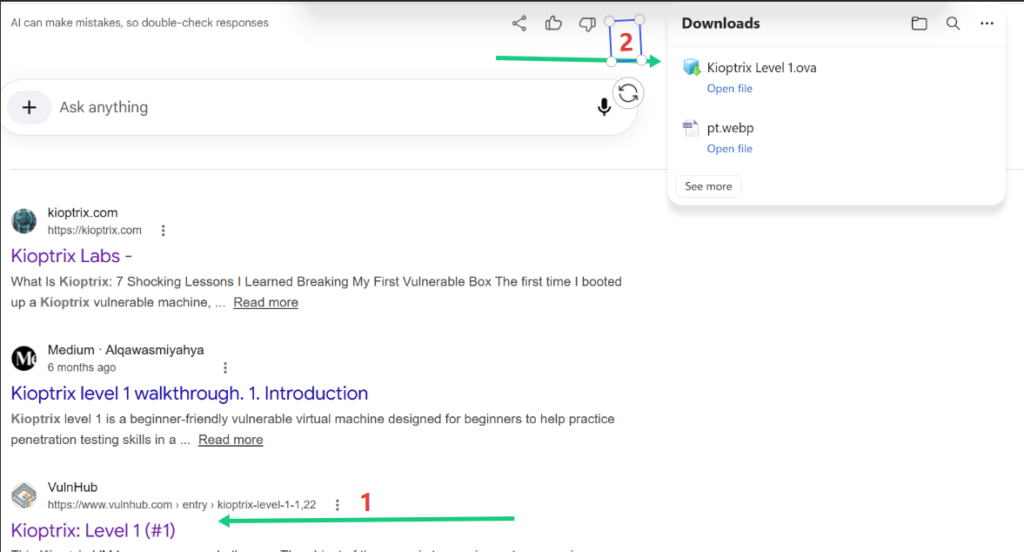
Once the download is complete, verify that you have successfully obtained the Kioptrix Level 1.ova file.
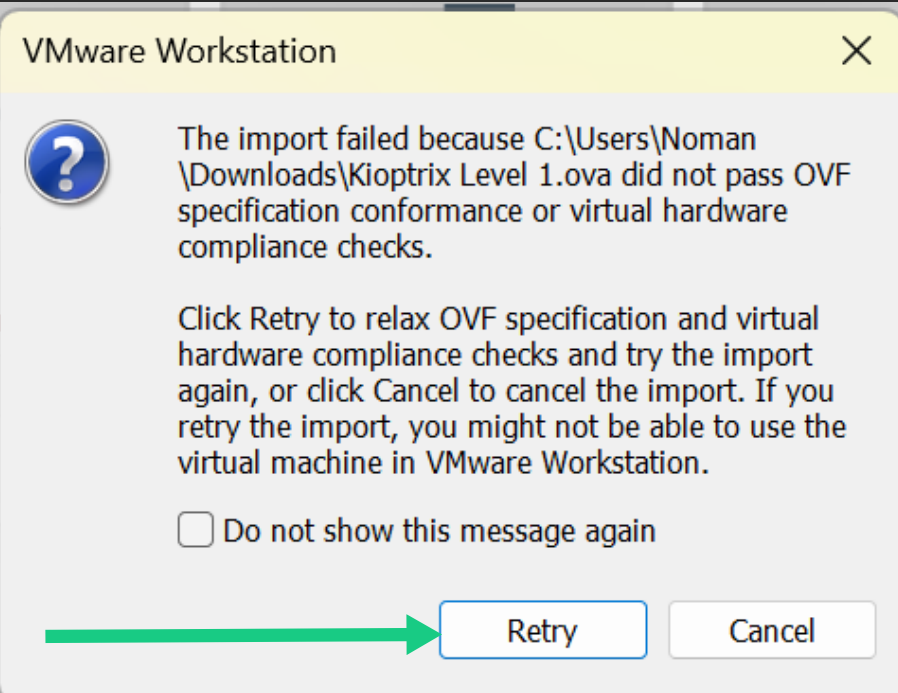
Troubleshooting Step: If you encounter an OVF specification conformance error during import in VMware, simply click the Retry button.
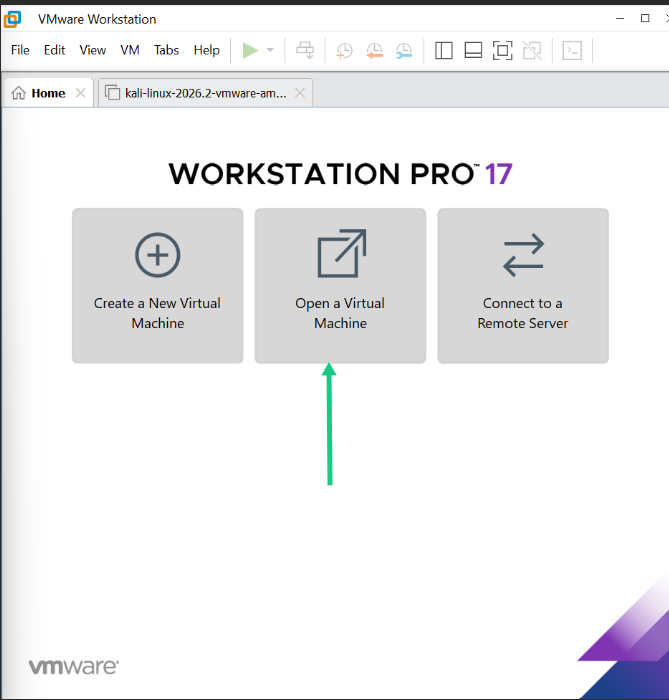
To begin the installation in VMware Workstation, click on the Open a Virtual Machine icon on the home screen.
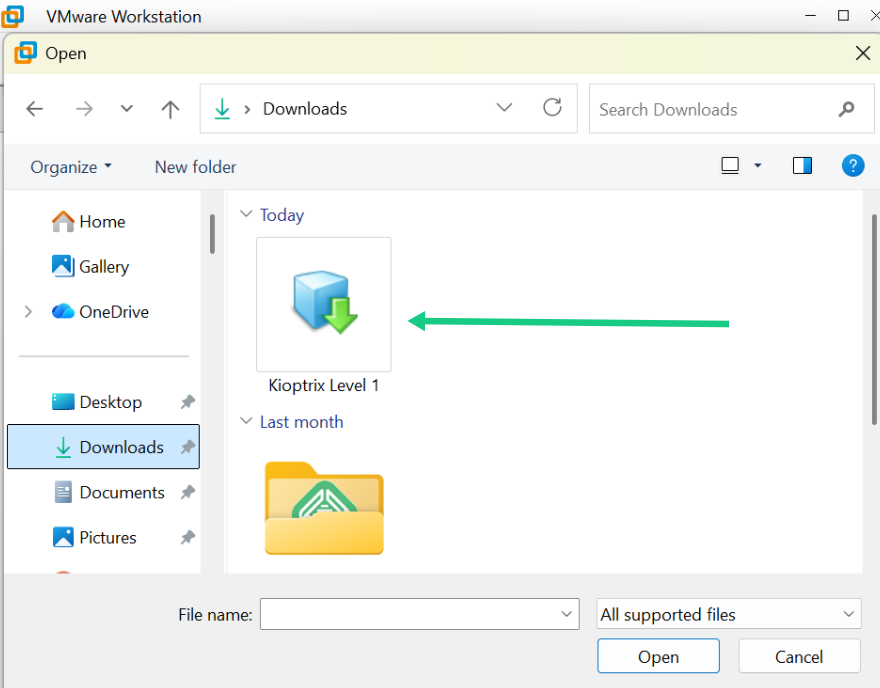
In the file explorer dialog, browse to your downloads folder and select the downloaded Kioptrix virtual machine file.Lorem ipsum dolor sit amet, consectetur adipiscing elit. Ut elit tellus, luctus nec ullamcorper mattis, pulvinar dapibus leo.
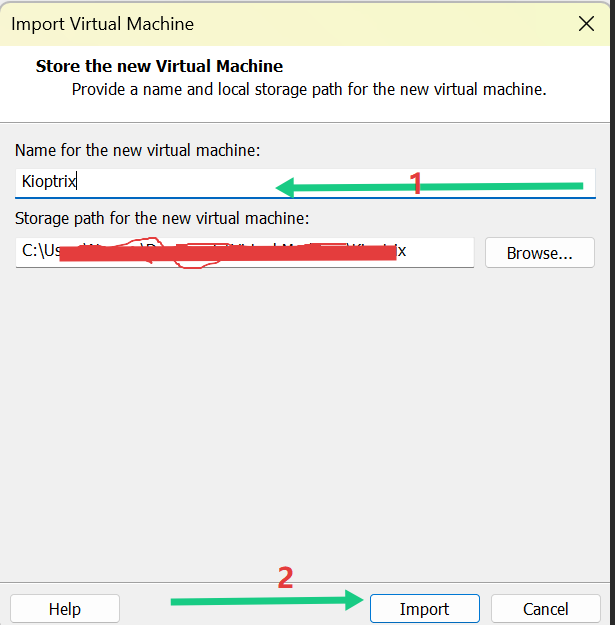
Provide a recognizable name like “Kioptrix” for your new virtual machine and confirm the storage path before clicking Import.
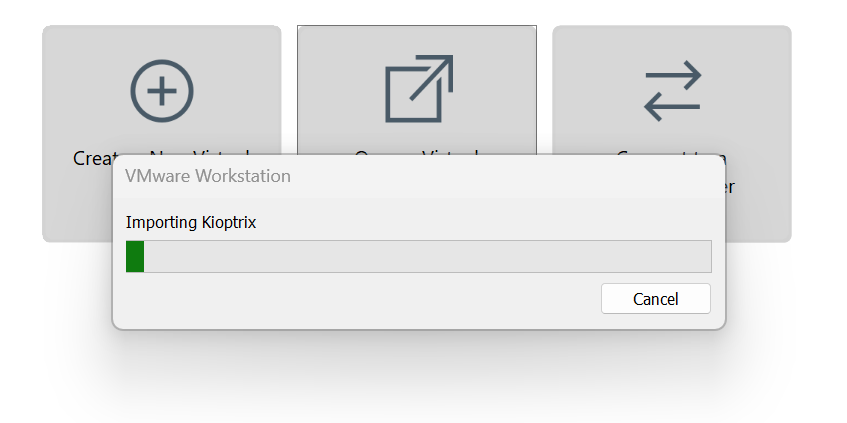
The import process will begin. Wait for the progress bar to complete as VMware configures the legacy virtual hardware.
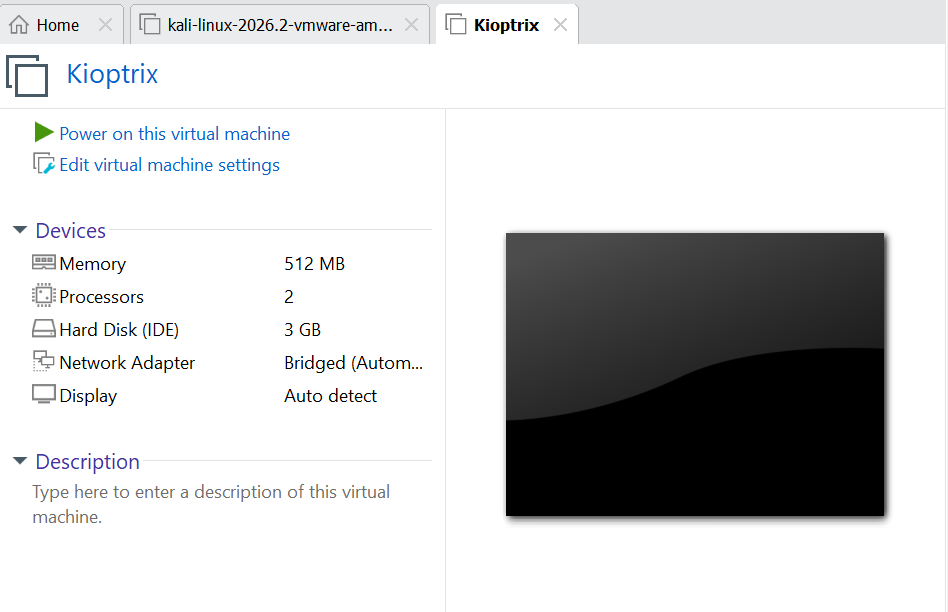
After a successful import, you will see the virtual machine summary screen with default hardware settings applied.
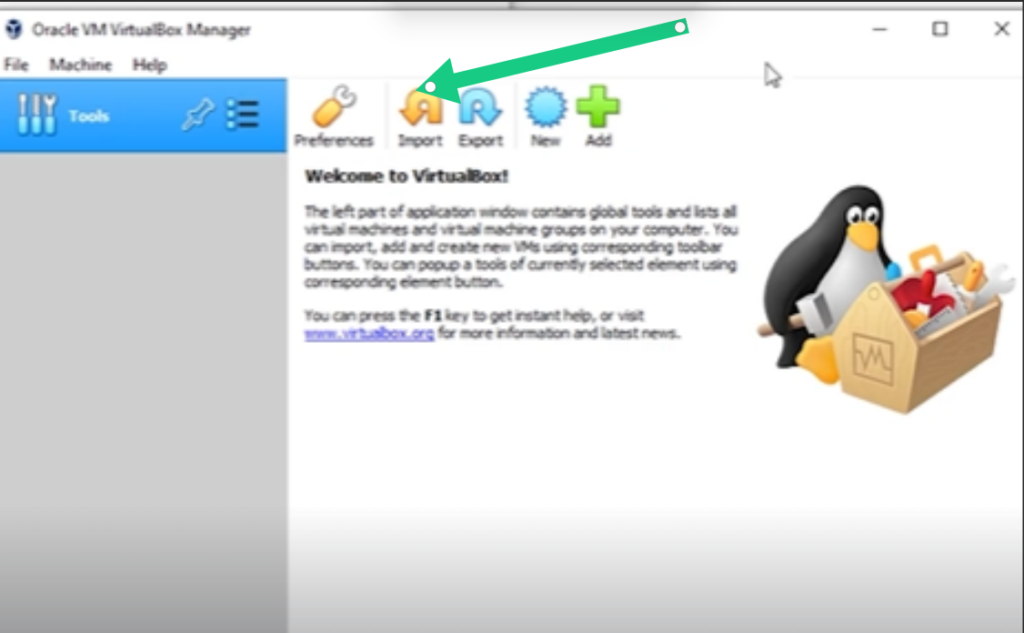
Alternative Method: To install in VirtualBox, navigate to the Tools menu and click on the Import icon to load the .ova file.
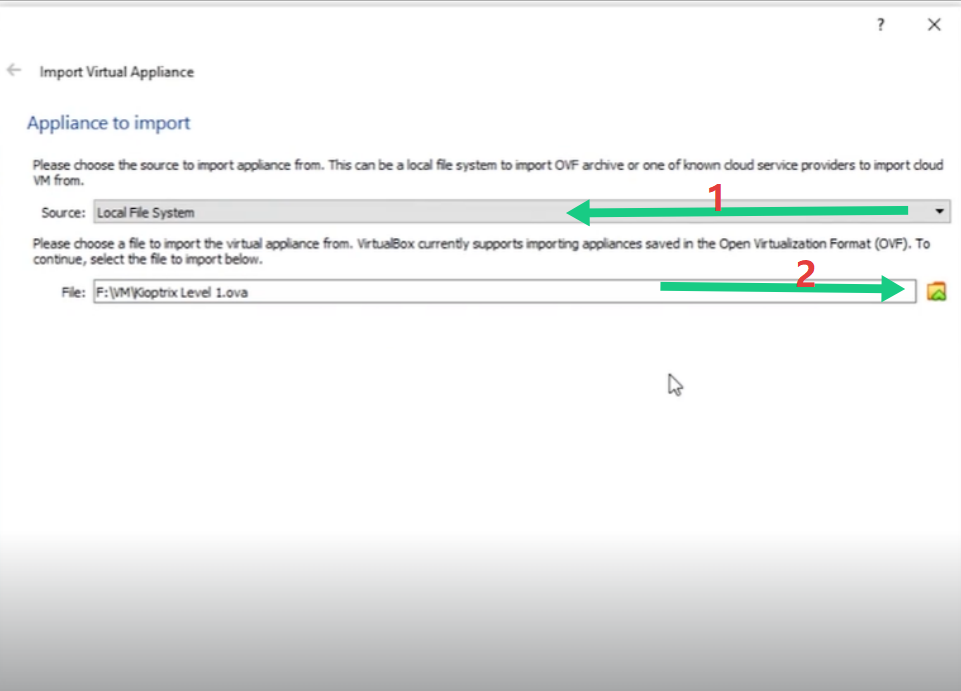
Set the source to Local File System and click the folder icon to browse for your Kioptrix .ova file.
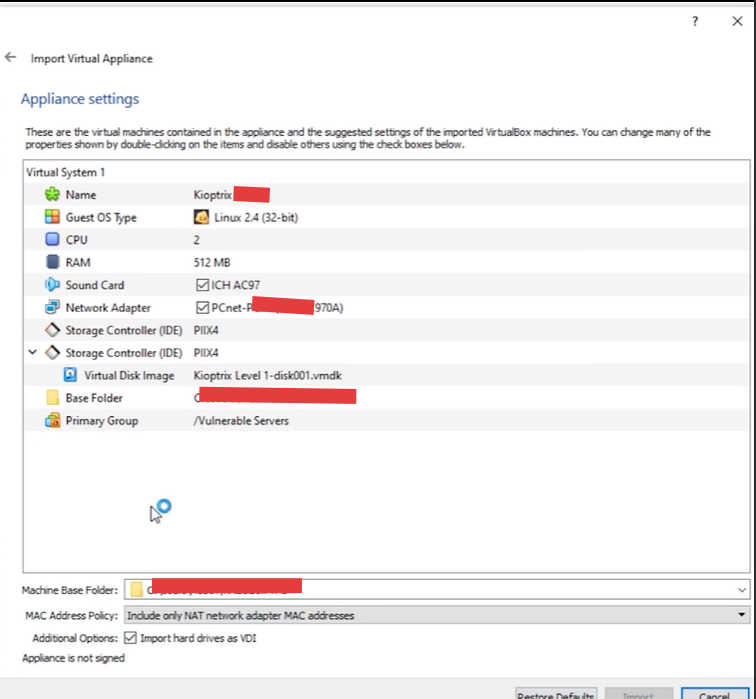
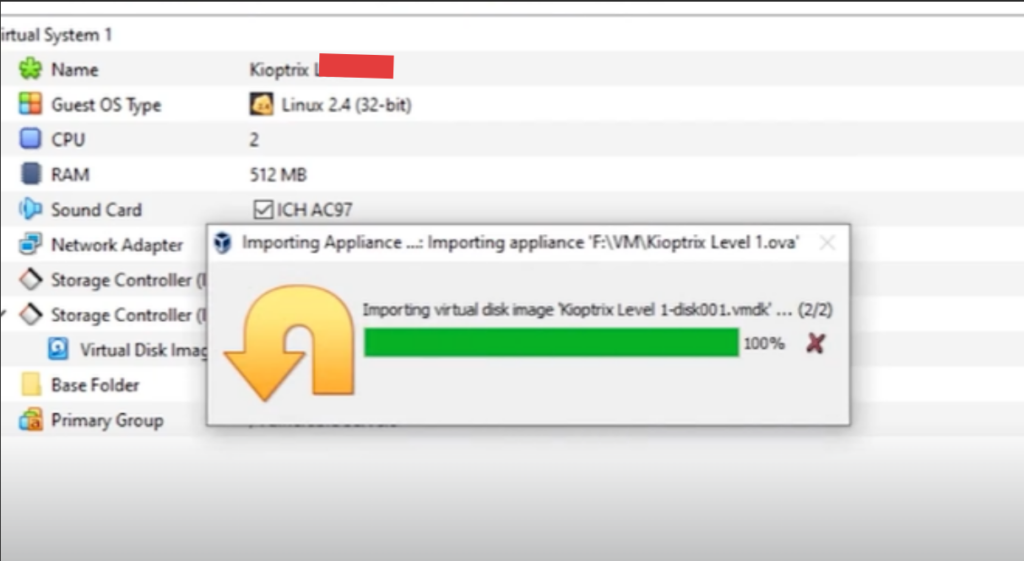
Review the pre-configured appliance settings such as OS type, CPU, and RAM allocation before proceeding with the import.
Monitor the progress bar as VirtualBox imports the .ova virtual disk image into your local VM library.
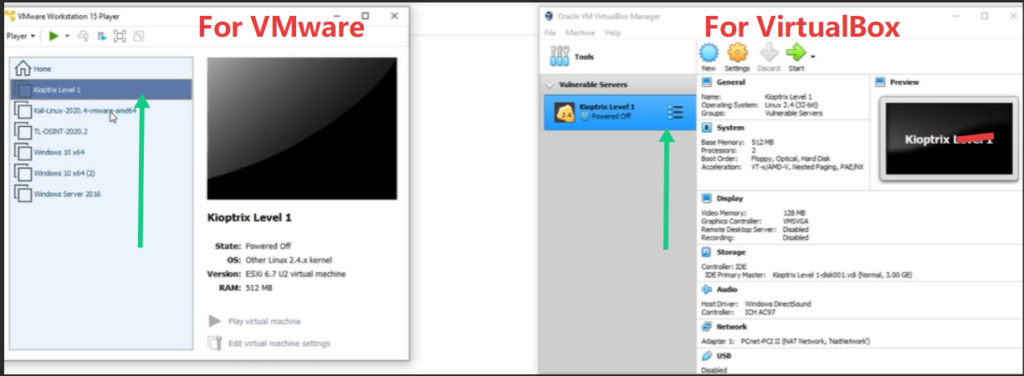
After import completion, the Kioptrix Level 1 virtual machine will appear in your VM inventory on both VMware Workstation and VirtualBox.
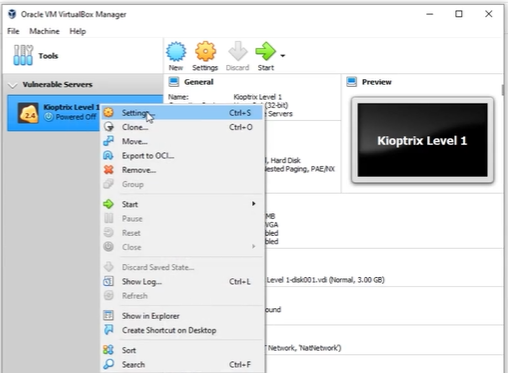
Right-click on the imported Kioptrix virtual machine in VirtualBox and select Settings to modify hardware configurations.
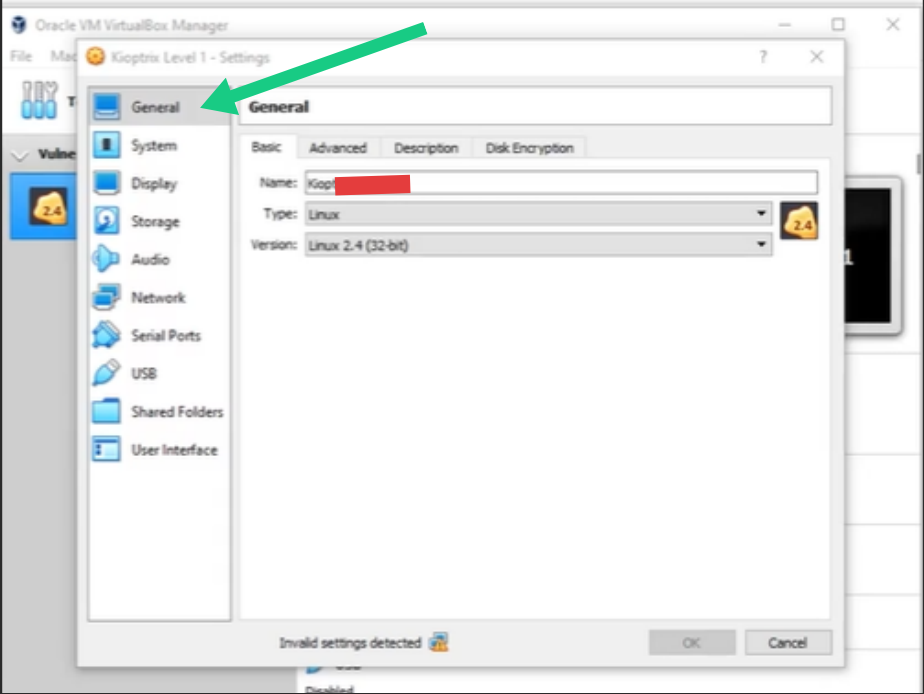
Navigate through the general settings tab to verify or update the VM name and base operating system platform.
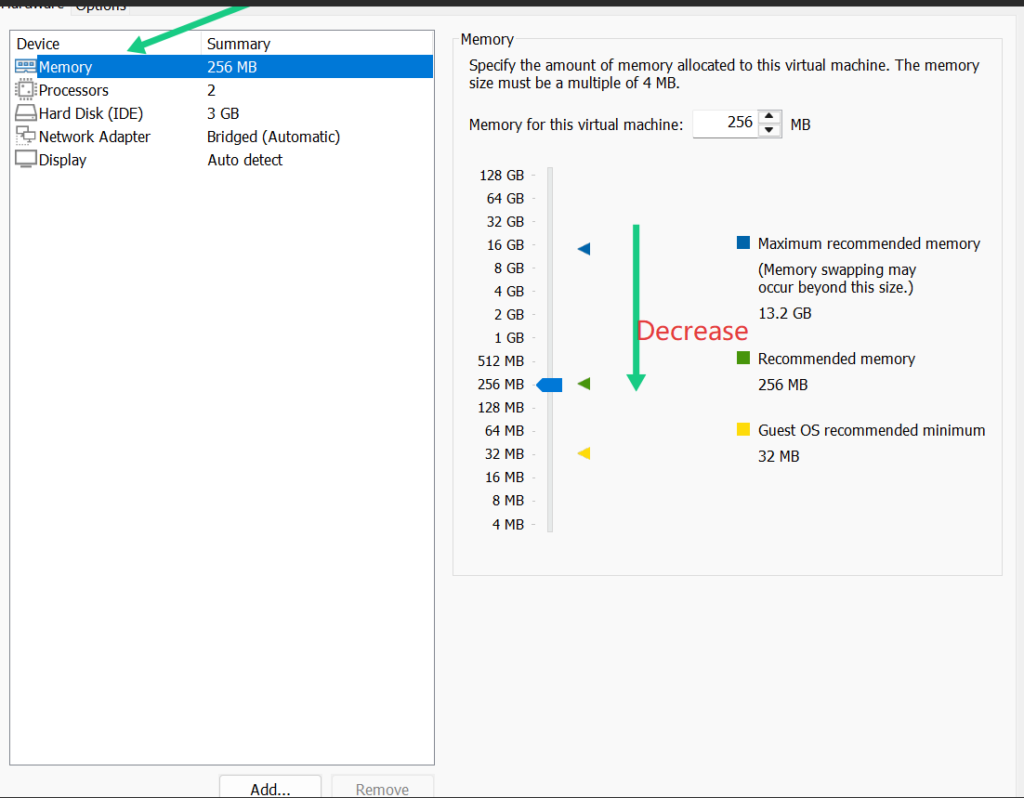
In VMware Workstation settings, adjust the allocated RAM (e.g., set to 256 MB or 512 MB) depending on your host system resources.
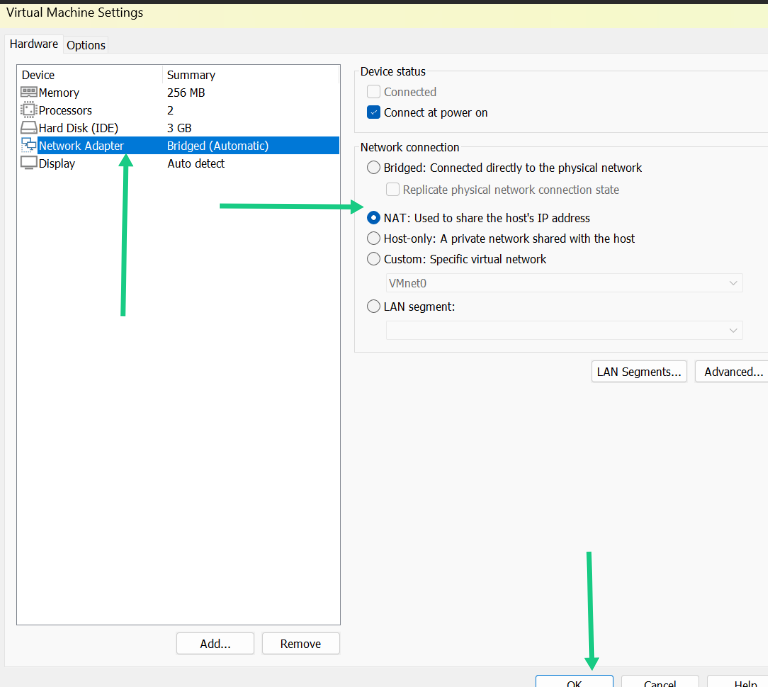
Select Network Adapter settings and switch the connection type from Bridged to NAT to share host IP safely.
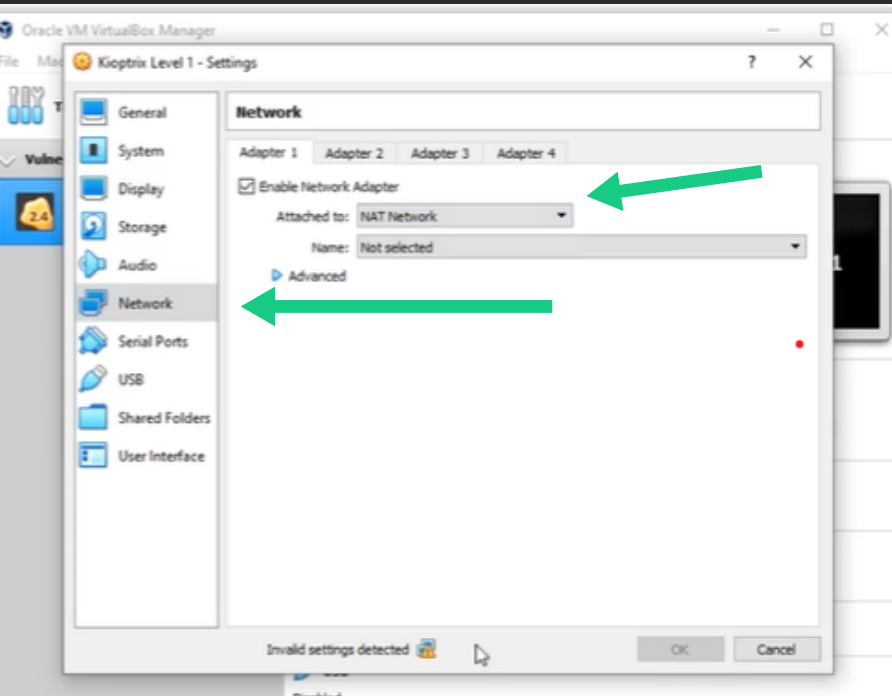
In VirtualBox Network settings, ensure Adapter 1 is enabled and attached to NAT or NAT Network for secure laboratory testing.
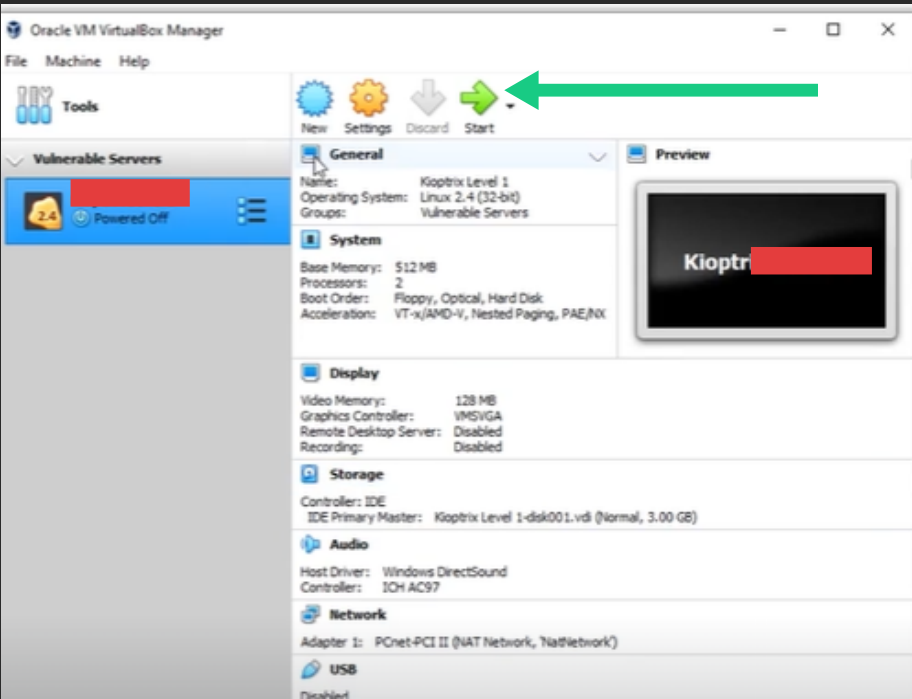
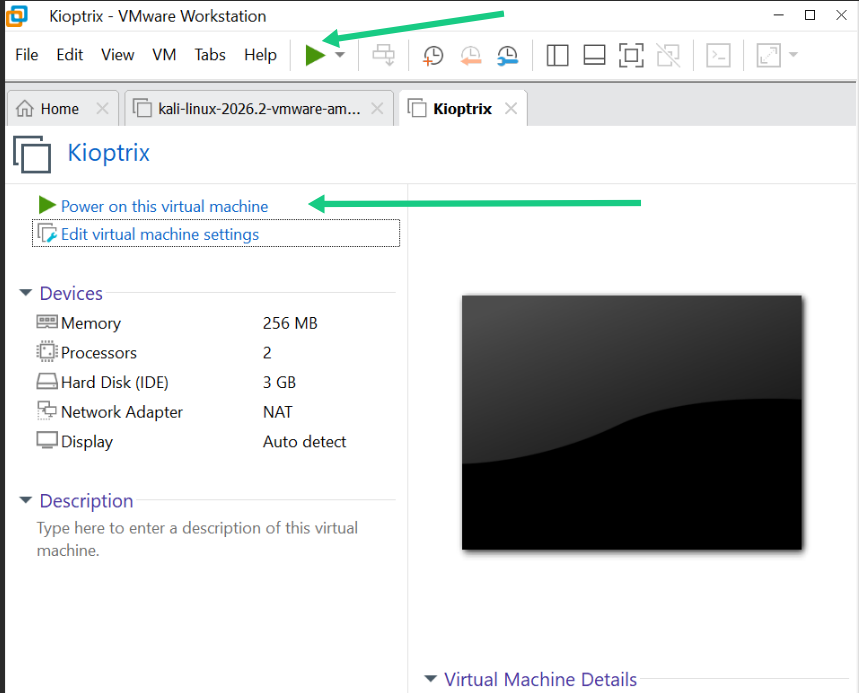
Once configurations are finalized, select the Kioptrix VM and click the green Start button to launch the lab server. Click on Power on this virtual machine or the top green play icon to boot up Kioptrix in VMware Workstation.
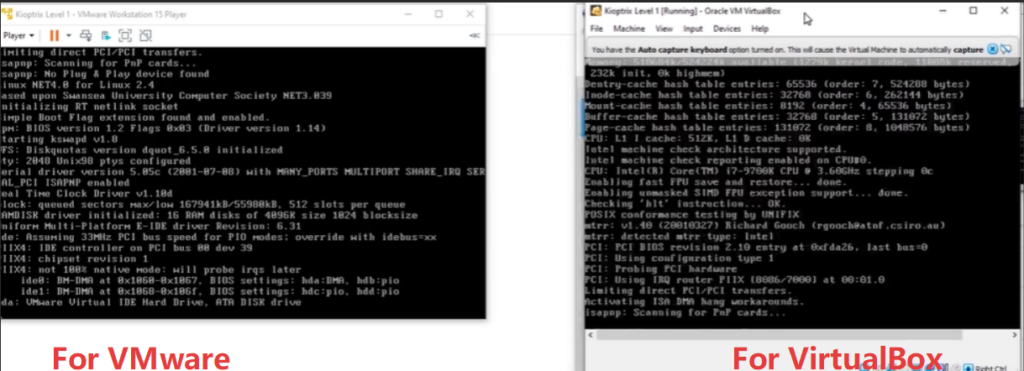
Observe the initial Linux kernel boot messages in the virtual console as the operating system initializes system devices.
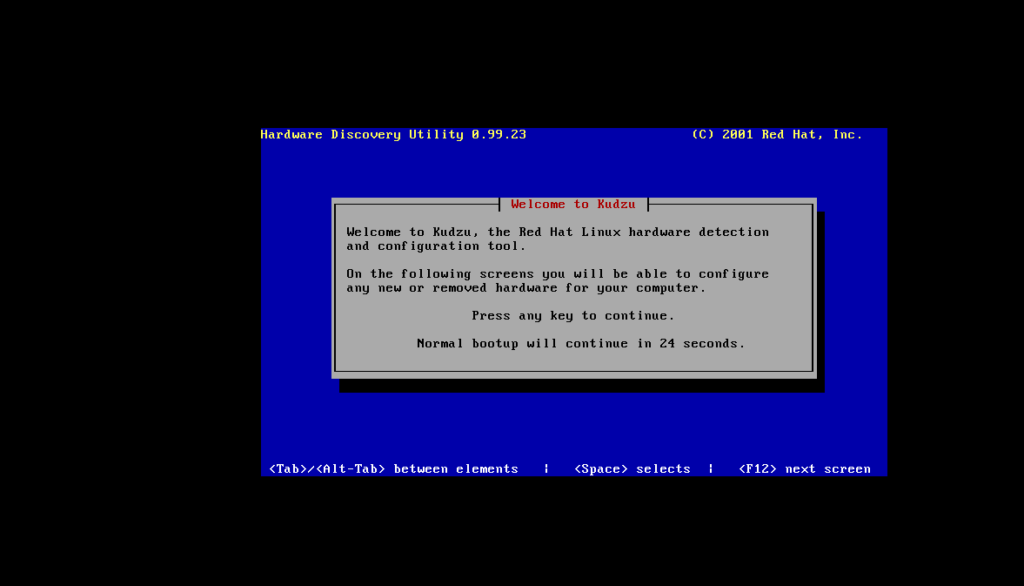
If the Red Hat Kudzu Hardware Discovery screen appears during boot, press any key or allow the timer to expire to continue.
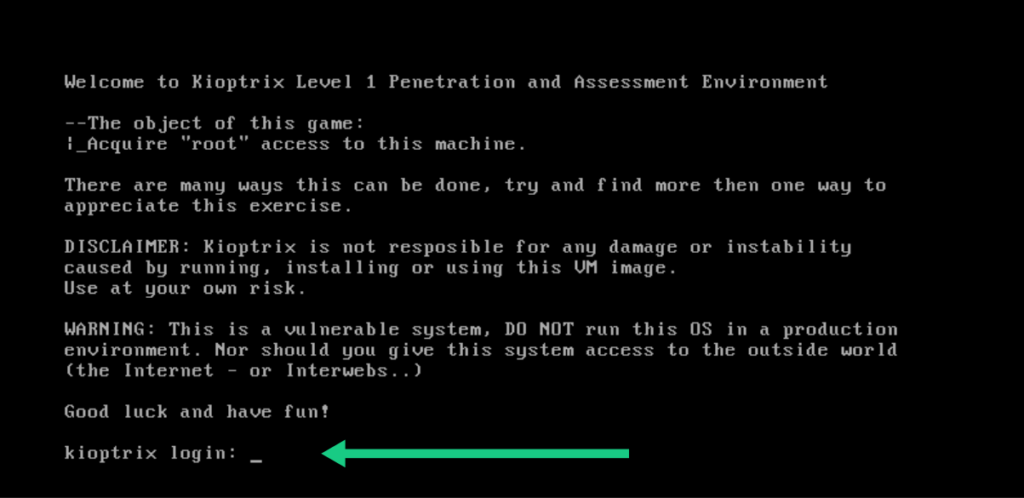
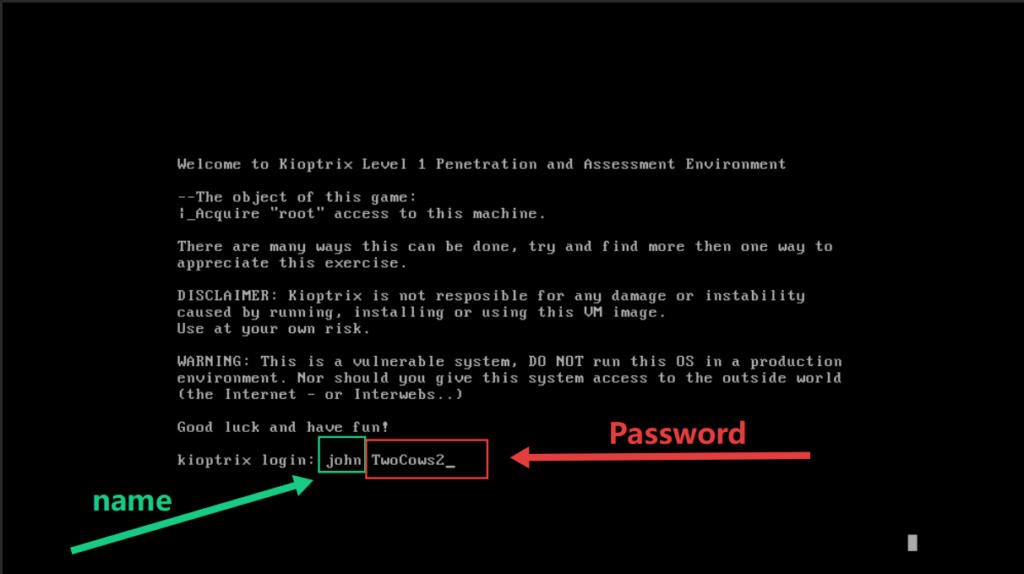
Once fully booted, the Kioptrix Level 1 welcome banner will display alongside the main terminal login prompt.
Terminal screen highlighting username entry ‘john’ and password entry ‘TwoCows2’ with green and red annotated boxes.
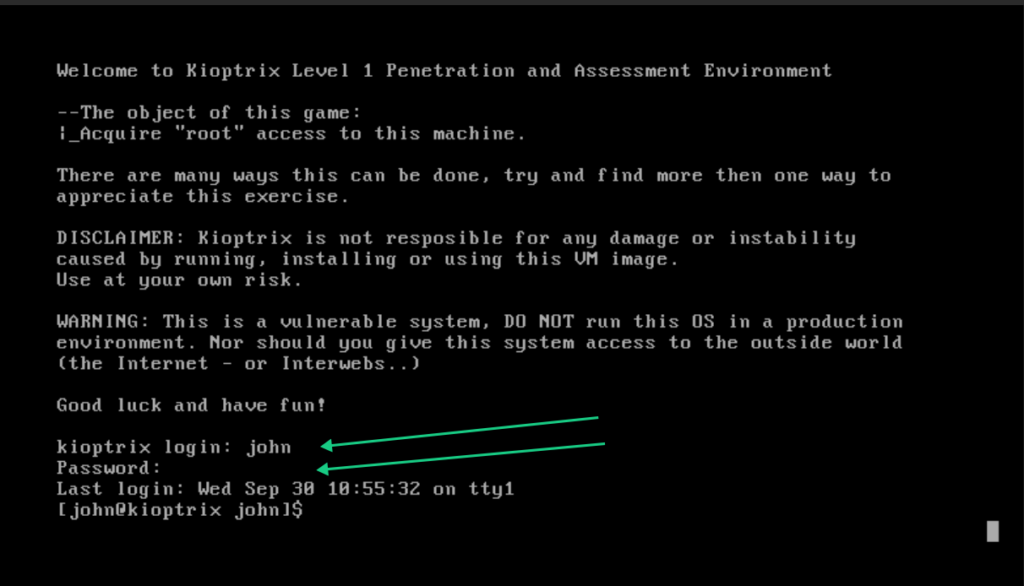
Upon successful authentication, you will gain access to the low-privileged user shell prompt (john@kioptrix).
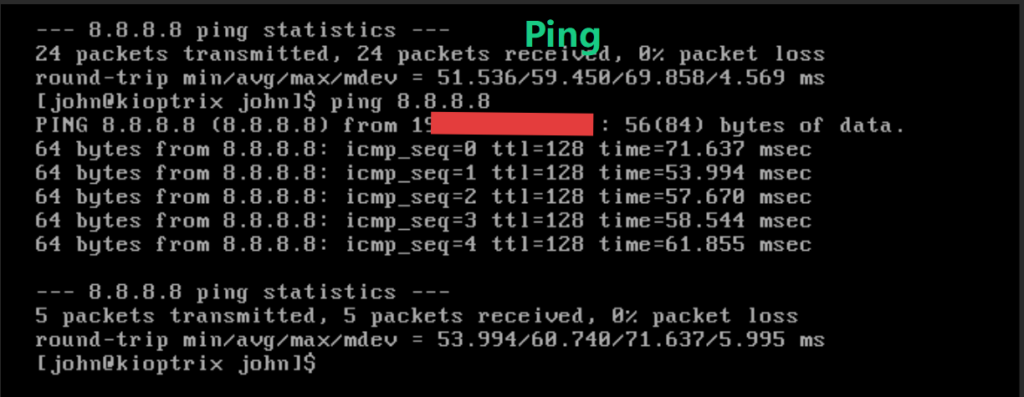
Verify VM network connectivity by executing a ping command (e.g., ping 8.8.8.8) to confirm active IP communication.